Blender is an amazingly powerful 3D package, which is unusual for an open source project. As a designer, I wish there was better control over how Blender rendered 3D text, particularly when it comes to deforming or curving text along a path.
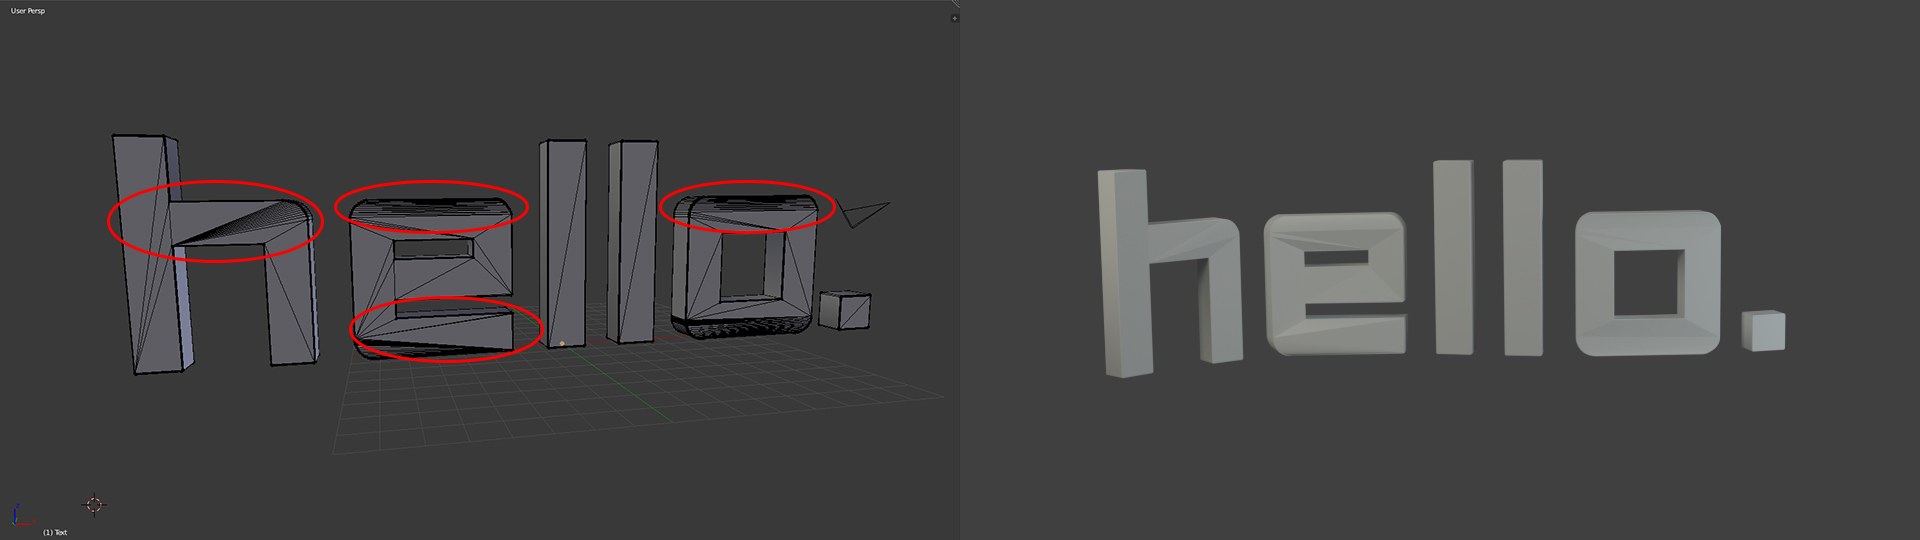
If we don’t plan on animating our text along a curve, Blender will handle everything without a hitch. However, the moment we begin deforming text along any axis, the software begins to show its weaknesses. When Blender renders fonts, it internally converts the font object into a (rather unoptimized) triangulated polygon. Like water or electricity, the algorithm tends to take the path of least computational resistance, which means long horizontal strokes of a typeface may only be composed of two or three triangles. When placed on a curve, those triangles don’t bend in a very appealing way, resulting in some ugly render artifacts.
If you do a quick Google search you’ll find a number of tutorials that show different ways of solving this problem, but not all of them are perfect. My own technique is, although time consuming, the best solution I’ve found that works for most situations.
Here’s the theory behind it: when deforming an object along a curve, the more points (vertices) you have in the object along the bending axis, the smoother the curved surface will be.

So how do we go about creating those extra horizontal points? It’s actually a pretty straightforward process.
- First, select your font object and use the Alt+C keyboard shortcut to manually convert to a polygon.
- Enter Edit Mode by pressing the Tab key and select all vertices by pressing the A key. You may have to do this a couple times—hitting the A key toggles selecting everything.
- Remove all duplicate vertices by pressing the “Remove Doubles” button under the Mesh Tools menu. For some reason, Blender thinks it’s OK to double up on vertices during the conversion process.
- Select each letter and separate it into it’s own mesh object. To do this, hover over the letter and press the L key (to select all linked vertices), then press the P key and select “Selection” under the pop-up menu. This is where the process begins to get tedious, especially if you have many letters.
- Now that we have each letter converted and separated, we need to retopologize them using the Remesh Modifier. Select each letter separately and add a Remesh Modifier, setting the Octree Depth to 7 or 8, Mode to “Smooth,” and selecting “Smooth Shading.”
- That’s it! Render out your text again to see your results.

